

Key Takeaways
Why Draughts Matter More Than They Look
A gap you can barely see under a door or around a window frame can allow a surprising volume of cold air into a room, particularly when outdoor wind pressure pushes against the building. Beyond comfort, uncontrolled air infiltration carries moisture that can settle on cooler internal surfaces, contributing to the condensation and damp issues described in our guide on damp, mould, and condensation.
Draught-sealing is among the most accessible home maintenance tasks available to renters and homeowners alike - it requires no specialist knowledge, no permits, and no tools beyond what most households already own. The key is understanding where air gets in, which product suits each type of gap, and how to avoid accidentally sealing off the ventilation a building genuinely needs.
For a broader look at how this task fits into year-round home upkeep, see our seasonal home maintenance guide. Draught-sealing is particularly effective when done in autumn before temperatures drop.
Test for Draughts on a Windy Day
Inspections are far more effective when wind pressure is naturally pushing air through gaps. Choose a blustery day, close all windows and doors, and move slowly around frames with a damp hand or a lit incense stick - you will feel or see movement at any problem spots immediately. Mark gaps with masking tape as you go so nothing is missed before you start sealing.
What You'll Need
The materials for this job are widely available and generally low-cost. Having everything ready before you start means you can work efficiently and avoid leaving gaps unsealed between sessions.
Self-adhesive foam draught strip
Compresses to fill the gap between a door or window sash and its frame on closing.
Brush or fin draught excluder strip
Attaches to the bottom of a door to block the gap between door and floor without snagging on carpet.
Flexible acrylic or latex caulk
Fills fixed gaps between window and door frames and the surrounding wall or architrave.
Caulking gun
Applies caulk in a controlled, even bead along joints and gaps.
Utility knife or scissors
Trims foam strip and brush excluder to the correct length.
Filling knife or old credit card
Smooths caulk into joints for a neat, weather-resistant finish.
Incense stick or damp hand
Detects moving air during a draught inspection without any equipment cost.
What you will need
Never Block Intentional Ventilation
Draught-proofing is not the same as making a home airtight. Purpose-built ventilation - trickle vents built into window frames, bathroom and kitchen extract fans, and airbricks - must remain unobstructed. Sealing these off can cause condensation, mould growth, and a build-up of indoor pollutants. If you are unsure whether an opening is structural ventilation or an accidental gap, leave it clear and consult a professional.
Step-by-Step: Sealing Doors and Windows
Follow the steps below in order - inspection before cleaning, cleaning before application - to get a durable result. Rushing the preparation stage is the most common reason draught strips fail within a season.
Inspect every door and window for gaps
Walk the perimeter of each exterior-facing door and window. Look for visible daylight around frames, feel for cold air with your hand, or use an incense stick - a smoke trail bending toward or away from a surface indicates air movement. Check the following locations on each opening:
- The four sides of the door or window frame where it meets the surrounding wall
- The rebate - the groove the door or window sits into when closed
- The bottom of exterior doors, which commonly have a visible gap to the threshold
- Letterboxes and keyholes, which are frequent sources of cold air infiltration
Note the type of gap: a gap around the perimeter of a fixed frame calls for caulk; a gap in the closing rebate needs compressible strip; a gap under a door needs a bottom excluder.
Clean and prepare all surfaces
New weatherstripping and caulk only adhere reliably to clean, dry surfaces. Before applying any product:
- Wipe down door and window rebates with a damp cloth to remove dust, grease, and paint flakes.
- Allow surfaces to dry completely - applying foam tape to a damp surface will cause it to peel within days.
- If you are removing old foam strip, pull it away cleanly and rub off any adhesive residue with a cloth dampened with a small amount of white spirit, then allow to dry again.
- For caulk joints, use a utility knife or old screwdriver to scrape out any crumbling or cracked existing caulk before you apply fresh material.
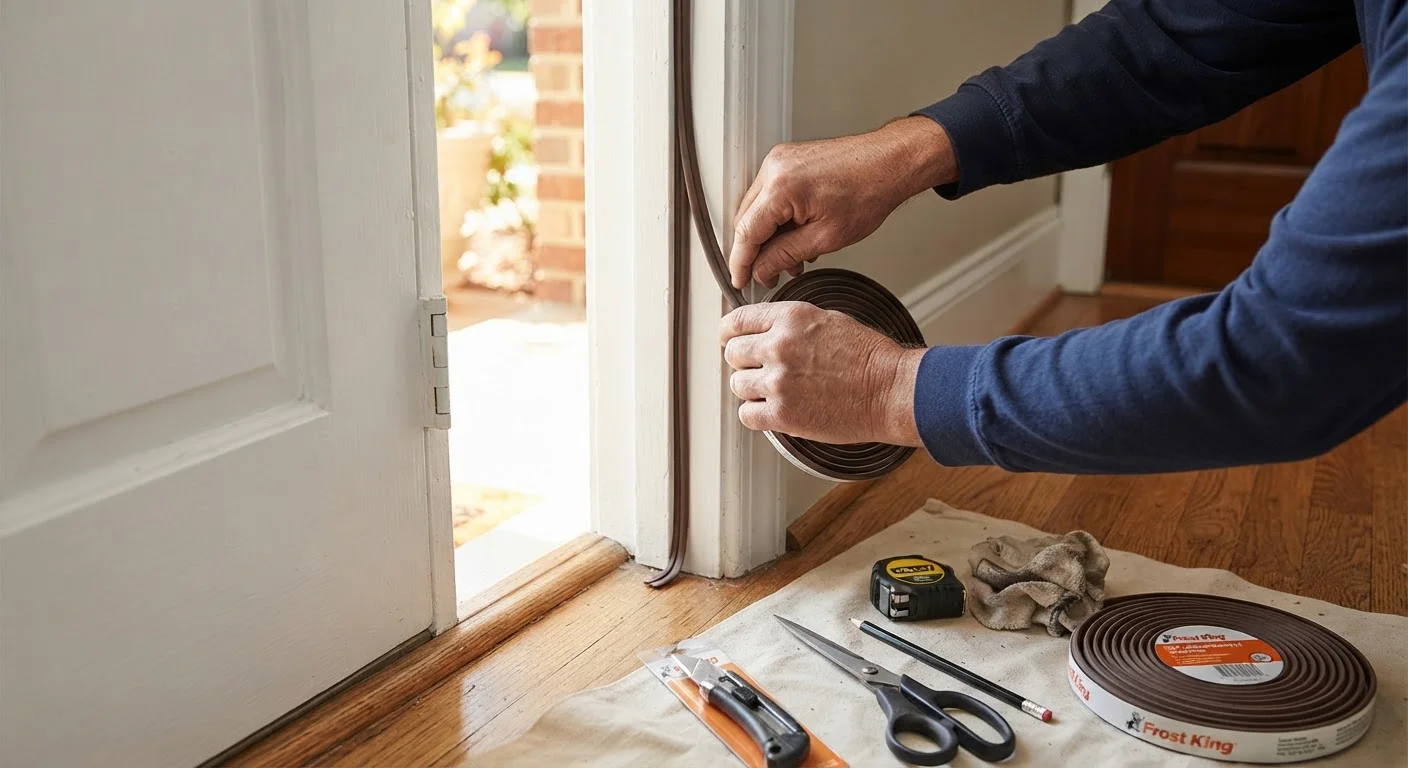
Apply foam or brush strip to door and window rebates
Self-adhesive foam strip (also called compression seal) is the correct solution for the gap in the rebate - the channel a door or window closes against. Choose a strip thickness that matches your gap: too thin and it won't seal, too thick and the door won't latch.
- Cut the strip to length with scissors, mitreing corners at 45° where possible for a neater join.
- Peel the backing and press firmly along the rebate, starting at one corner and working continuously to avoid air pockets.
- Close the door or window and check that it still latches without forcing - if it does not, switch to a thinner profile.
For the hinge side of doors, a brush or fin strip often performs better than foam as it tolerates the slight rotation of the door as it closes.
Fit a bottom door excluder
The gap between the bottom of an exterior door and the threshold is typically the largest single source of cold air infiltration. A brush excluder - a strip of nylon bristles mounted on an aluminium bar - is the most versatile solution because it flexes over carpet and uneven floors without dragging.
- Measure the door width and cut the excluder bar to length if required.
- Position the bar on the inside face of the door, bristles just touching the floor when the door is closed.
- Mark the screw holes with a pencil, drill pilot holes if the door is solid wood, and fix with the supplied screws.
- Open and close the door several times to confirm the bristles sweep the threshold without catching or lifting the door off its latch.
For a letterbox, a proprietary letterbox draught excluder - a brush insert that fits into the existing aperture - takes less than ten minutes to fit and makes a meaningful difference to heat loss near the door.
Caulk fixed gaps between frames and surrounding walls
Where the outer edge of a window or door frame meets the surrounding plasterwork or brickwork, movement over time creates hairline cracks that allow both air and moisture to enter. Flexible acrylic or latex caulk - not silicone - is the right product here, as it can be painted over once cured.
- Load the caulk tube into a caulking gun and snip the nozzle at a shallow angle to produce a bead slightly narrower than the gap.
- Apply a continuous bead along the joint, holding the gun at a consistent angle and moving at a steady pace.
- Smooth immediately with a damp finger or filling knife, pressing the caulk into the gap and removing excess.
- Allow to cure fully before painting - check the product label for the recommended time, typically 24 hours.
For deeper cracks, press a strip of backer rod (a foam cylinder available from hardware stores) into the gap first to reduce the volume of caulk needed and prevent shrinkage. If you find caulk failing repeatedly in the same spot, our guide on why caulking fails explains the underlying causes.
Test the results and check ventilation is unaffected
Once all materials have cured, repeat the draught test from Step 1. Any remaining air movement indicates a gap that was missed or where the strip has not compressed correctly. Adjust as needed.
Critically, confirm that all intentional ventilation openings remain clear: trickle vents in window frames, extractor fans in kitchens and bathrooms, and any underfloor airbricks. These are designed into the building and must not be blocked. Over-sealing without adequate ventilation can increase condensation and contribute to damp - a problem explored further in our article on damp, mould, and condensation.
Avoid Silicone on Moving Parts
Do not apply silicone sealant directly to door or window rebates (the channel the frame sits into) where parts need to open and close freely. Silicone will bond surfaces together and can damage finishes when pulled apart. Reserve sealant for fixed, non-moving joints between the frame and the surrounding wall.
Once complete, the improvement in comfort is usually noticeable immediately. For related upgrades that complement this work, our overview on draught-proofing impact and scope covers additional areas of a home worth addressing, including floors and loft hatches. And if you want to ensure your sealing efforts don't inadvertently affect indoor air quality, understanding home ventilation is a useful companion read.